Morning ladies! This week Cupcake Challenge 46 has the fabulous theme of Summer and the equally fabulous prize of a $20 gift certificate for Simon Says Stamp for one lucky winner. Unfortunately Lauren has decided to stop running the challenge blog so next week will be our last ever challenge...weep weep. I am also going to enter this card into Charisma Cardz Challenge 25 where anything goes and Stamp Something where you have to use three embellishments.
For my card I have used the very sweet Sugar Nellie stamped image of Daisy that I received from a blog bud and she is coloured with distress inks. The paper is from doodlebug and I just love it! I kept the layout nice and simple as I thought the paper was so pretty and I couldn't bear to cover it up!! My three embellishments are ribbon and two pearls and I used my threading water punch to add the scallops.
The inside is once again, nice and simple and the sentiment is from whiff of joy.
Supplies
Card/Paper: White, yellow and pink card, Doodlebug paper
Stamps: Sugar Nellie - Daisy, WOJ - General Sayings set
Colouring: Distress inks - tattered rose, vintage photo, worn lipstick, faded jeans, peeled paint, broken china, spiced marmalade, weathered wood
Embellishments: ribbon, pearls
Tools: Cuttlebug, nesties, fiskars threading water punch, water brush
Thanks for looking. x
Monday, June 29, 2009
Sunday, June 28, 2009
Stamptacular Challenge 13
Here we are at Stamptacular Challenge 13, where the theme is "Party Animal" and one lucky winner will receive some gorgeous SU goodies from Emma who is our sponsor this week.
For my DT card I have used a house mouse image that I received from a blog bud and it is coloured with distress inks. The papers are from K & Co and they go perfectly with the image....well I think so anyway!!! I kept the layout simple as the papers are so detailed I didn't want to make the card too busy. The embossing was done using my swiss dots folder, the ribbon is from my stash and I finished off with four small jewels.
On the inside of my card I added a recipe for strawberry and vanilla shortcakes which I did on my computer using the font lucinda handwriting. The sentiment us from SU and the two flourishes were done using my spellbinders doodle parts die.
Supplies
Card/Paper: Red and white card, K & Co paper
Stamp: House mouse, SU sentiment
Colouring: Distress inks - fired brick, vintage photo, walnut stain, tattered rose, peeled paint and weathered wood.
Embellishments: Ribbon, jewels
Tools: Cuttlebug, nesties, swiss dots folder, doodle parts
Thanks for looking. x
Labels:
Cuttlebug,
Distress Inks,
DT,
House Mouse,
Nestabilities,
Stamptacular
Thursday, June 25, 2009
Summery Tilda with Flowers
Just got this one done in time, even though the card has been partly made for days! Just Magnolia Challenge 10 has a theme of summer, I have used the sketch from Sunday Sketch and Stamp Challenge 5 and I'm also going to enter this card for Charisma Cardz Challenge 25 where anything goes.
For my card I have used a Magnolia image that I received from a blog bud and Tilda is coloured with distress inks. I have added some stickles to the centre of all the flowers to give the image a bit of lift and sparkle. The papers are from pebbles inc and the sentiment was done on my computer using the font lucinda handwriting.
The inside is decorated using the same papers and I have also used the influence of the sketch.
Finally, a close up of Tilda so you can see the colouring, but unfortunately the sparkle in the flowers doesn't show through. I think this image is ever so sweet and I really find the Magnolias a joy to colour.
Supplies:
Card/Paper: White and pink card, Pebbles inc
Stamp: Magnolia - Tilda with Flowers
Colouring: Distress inks - vintage photo, worn lipstick, tattered rose, broken china, antique linen, peeled paint, weathered wood
Embellishments: Primas, PM pearl brad, pearls, stickles
Tools: Cuttlebug, nesties, leone em branch punch, water brush
Thanks for looking x
Tuesday, June 23, 2009
Sugar Bowl Challenge 13
Over at the Sugar Bowl this week there is a fabulous sketch by Lillian to follow with the option of using kraft or brown and cream. I have no kraft items so I went with the brown and cream look!
I felt the need to use another gorjuss girl as I hadn't used one for a while.... it must be all of two weeks!!! and I decorated an envelope to go with the card too as a nice finishing touch. My image is coloured with distress inks and the papers are from papermania.
I used the sketch as an influence for the inside too and a partial image of the gorjuss girl. The sentiment on the front was computer generated and all the embellishments are from my stash.
For those of you who are regular visitors, you will have noticed that I'm faffing about with my post layouts once again! Since all the blogger problems and I changed my browser to firefox, my posts in their old format weren't as easy to do. I will settle on something eventually!.
Supplies:
Card/Paper: Cream and Brown card, Papermania - Antique Cream
Stamp: Sugar Nellie - Just a girl
Colouring: Distress inks - walnut stain, vintage photo, tattered rose, antique linen, weathered wood and worn lipstick.
Embellishments: Prima, PM pearl brad, pearl, ribbon
Tools: Cuttlebug, nesties, leone em branch punch, water brush.
Thanks for looking. x
Labels:
Cuttlebug,
Distress Inks,
Nestabilities,
Sugar Nellie
Monday, June 22, 2009
Cupcake Challenge 45
Afternoon ladies, apologies for the late post, I just didn't get the chance to pop this card on this morning. This is my DT card for Cupcake Challenge 45 where Laurn has done a brilliant sketch for us all to use. This week our sponsor is Sandra Dry Digi Designs and she has very kindly provided the DT with one of her fabulous images to use.
For my card I chose the image Rosabella Wish, I think she looks so sweet. I coloured my image with distress inks, being very careful around the lines and I have used stickles to colour her wings. I wish I had glitter cam as unfortunately it doesn't show on the image, but they are lovely and sparkly in real life.
Supplies:
Card/Paper: White and pink card, Papermania - Venitian Skies
Digi Image: Rosabella Wish - Sandra Dry Digi Designs
Colouring: Distress inks - peeled paint, tattered rose, worn lipstick, weathered wood, vintage photo and broken china.
Embellishments: American Crafts ribbon, pearls, silver stickles
Tools: Cuttlebug, nesties, d'vine swirl folder, standard paint brush
As usual the DT have made some stunning creations, so make sure you check out the challenge blog.
Thanks for looking x
Labels:
Cupcake,
Cuttlebug,
Digi-Stamps,
Distress Inks,
DT,
Nestabilities
Sunday, June 21, 2009
Post It Note Holder Tutorial
Hi girls. I have just done this quick tutorial to show you how I made my post it note holder in my previous post. It is very quick and easy to do and it would make a nice little gift.
You will need:
1 x piece of cardstock that measures 3.25 x 7 inches
3 x pieces of cardstock that measure 3 x 3 inches
2 x pieces of DP that measure 2.75 x 2.75 inches
2 lengths of ribbon approx 5 inches in length
Glue/double sided tape
Scissors
Bone folder
Embellishments of your choice
Firstly, take your long piece of cardstock and score at 3.25 inches from each end.
Next, fold along the score lines to create a spine in the centre.
Take your two pieces of DP and adhere them to two pieces of your 3 x 3 inch card.
Set them to one side.
Next, take your large piece of cardstock, centre your ribbon and adhere like shown in the photo above. I use scotch tape for sticking ribbon as it is easily removed if you stick it in the wrong place!
Take your plain piece of 3 x 3 cardstock and adhere this to the inside bottom panel to cover the ribbon (this is the right panel in the photo, I had to take the picture this way to fit it all in). This is where your post it notes are going to be fixed to so there is no need to decorate this with DP as it will not be seen. Take one piece of card matted with DP and adhere this to the top inside panel.
Next, turn it over and adhere your final piece of card matted with DP to the front. I have embellished mine before adhering it as I have used a brad to fix my flower on and I didn't want it to be seen on the inside.
Adhere your post it note to the inside.
Finally, tie your ribbon and your post it note holder is finished.
To embellish I have used a WOJ sentiment from the general sayings set, primas, PM pearl brad, spacer, charm, pearl and the leaves were created with my leone em branch punch.
And finally, from another angle!
Thanks for looking x
Stamptacular Challenge 12
This week Stamptacular Challenge 12 has a theme of Red, White, Blue and a Star too, and our very own Donna of Bearly Mine Designs is sponsoring this challenge.
The rest of the DT have made some amazing creations, so be sure to go and check them all out and we would love you to join in the challenge.
Instead of a card this week I have made a post it note holder. It was super quick and easy to make and it turns something quite ordinary into a nice little gift.
I haven't put too many pictures in this post as have done a quick tutorial on how I made it with LOADS of pictures for you to see it from several different angles!!! The tutorial will be posted soon!
This is it opened up so you can see the post its inside.
I didn't have an image to colour so it seems strange not writing about one! The sentiment stamp is from Whiff of Joy, the general sayings set.
The pretty paper was in a stack that Jeff's mum brought over for me so I'm not sure what make they are.
The ribbon is from my stash and the flowers are primas, I used my leone em punch to make the branches - I love this punch, the branches are so dainty.
The pearl brad is from PM and the pearl, charm and spacer are all from my stash.
Finally a close up of my embellishments.
Just in case you can't see it, my star is on my charm!
Supplies:
Card/Paper: White and blue card, paper from stash
Stamp: WOJ - General Sayings Set
Colouring: None!!!
Embellishments: Primas, PM brad, pearl, charm and spacer
Tools: Cuttlebug, oval nesties, leone em punch.
Thanks for looking x
Saturday, June 20, 2009
Another Cookie Card!
Evening ladies, Firstly I must apologize as I made a very similar card for last week's WOJ challenge, but this one is for a commission and I thought Willows apron would be perfect for paper piecing so I had to enter it for WOJ challenge 35.
This card is also for Creative Inspirations Challenge 13 where the theme is also paper piecing, Secret Crafter Challenge 37 is pink and green and finally Spoon Full of Sugar Challenge 56 which is a fab sketch.
I had never tried paper piecing before but I love the effect it gives so I will definitely be doing it again! The rest of the image is coloured with distress inks and I tried to go for a distressed look with this card so I have distress the papers with tattered rose and the edge of the image with antique linen and tattered rose. I wasn't too sure about it at first, but I think it has come out ok.....well at least I hope so!!!
The papers are from Laura Ashley, the flowers are primas and I have used my leone em branch punch to create .... well...the branches!! I so love this punch, if any of you are thinking about buying it, just buy it!! you'll love it too!!
I have decorated the inside to compliment the front and I have also added my cookie recipe.
Both the cookie recipe and the sentiment on the front are computer generated using the font lucinda handwriting.
Finally, a close up of my colouring and paper piecing. WOJ are looking for additional DT members but unfortunately I'm not sure I have enough WOJ stamps to apply, so I gave it a miss...weep weep!
Supplies:
Card/Paper: Green, white and pink, Laura Ashley - Contemporary range.
Stamp: WOJ - Willow with cookies
Colouring: Distress inks - tattered rose, vintage photo, peeled paint, faded jeans, antique linen. Silver gel pen
Embellishments: Primas, jewel brad, charm, jewels
Tools: Cuttlebug, nesties, d'vine swirl folder, water brush, leone em punch.
Thanks for looking. x
Friday, June 19, 2009
Winter Wonderland Ch 3 & Sketch Saturday Ch 55
Well, can you believe it, because I can't.....I have managed to do another christmas card already!!!
I have been vowing from the start to join in with the new Winter Wonderland challenges and I have finally manged to do so at challenge 3! Their theme this week is "let it snow" and for my card I have also used the fab sketch from Sketch Saturday Challenge 55.
The penny black image is coloured with distress inks and I have highlighted the snow with icicle stickles. It is quite sparkly in real life, but unfortunately it doesn't show on the photograph.
The papers are from DCWV and I have used my snowflake folder for the embossing.
Supplies:
Card/Paper: White, pink and lilac card, DCWV - rose tinted christmas
Stamp: Penny Black
Colouring: Distress inks - tattered rose, vintage photo, weathered wood, walnut stain, dusty concord, worn lipstick, spiced marmalade and broken china
Embellishments: primas, PM pearl brad, pearls, ribbon, icicle stickles
Tools: cuttlebug, snowflake embossing folder, leone em branch punch, fiskars threading water punch.
Thanks for looking. x
Tuesday, June 16, 2009
Penny Black Wk 53 & Friday Sketchers Ch 56
Well, its my first Christmas card of the year.... in June..... I thought I'd make an early start on them this year as I was just so sick of them by the time Christmas came around last year. I'm going to try and do at least one a week from now on!!!
This card is for two challenges; Penny Black are celebrating their first birthday and you have to make a card for a celebration and I have used the fab sketch from Friday Sketchers Challenge 56.
As you can see, I have made a card and matching envelope combo.
The penny black image is coloured with distress inks and I have also distressed the edges of my oval with broken china ink.
The papers are from DCWV and the embossed panel has been done with my snowflake embossing folder. The sentiment is computer generated using the font lucinda handwriting.
I did a bit of recycling with the white twill that goes across the middle of the card. Jeff's parents were recently here and his mum brought over a tea towel that she got for 1p from the recent promotion at M & S, well the tea towel was folded up and this twill was tied around it, just perfect for a card!!!
Finally a picture of the inside.
Supplies:
Card/Paper: White and red card, DCWV - Christmas Wishes
Stamp: Penny Black - Hedgy Shuffle
Colouring: Distress inks - fired brick, peeled paint, broken china, antique linen, tattered rose, vintage photo, walnut stain
Embellishments: jewels, twill from M & S!!
Tools: Cuttlebug, nesties, snowflake embossing folder, water brush.
Thanks for looking x
Labels:
Christmas,
Cuttlebug,
Distress Inks,
Friday Sketchers,
Nestabilities,
Penny Black
Monday, June 15, 2009
Cupcake Challenge 44
Cupcake Challenge 44 was set by Jeanette and she chose a father's day theme with the added twist that you have to do more than just a card.
I got my thinking cap on and as I have very few appropriate male stamps and none which are really suitable for my dad, I decided that this week my project would not contain any form of stamping..... as I have none to choose from!!!
I decided I would make a card and gift combo and as my dad is a big fan of red wine, something with that seemed to be the obvious choice. I went in search of inspiration on SCS and found this fab tutorial here for a hanging treat box.
The box just easily slips over the top of the wine and in the little box on the front I have added two small bars of chocolate. It was so easy to make and so effective. It can also be adapted to other themes such as for a child using a bottle of juice and some sweets, or a sports fan using a bottle of water and some high energy snacks.
My matching card and hanging treat box have the same layout. The papers are from my stash and the sentiment is computer generated.
For the embossing I used my swiss dots folder and to try and brighten it up a bit, I finished off with a small jewel.
The rest of the DT have done some awesome projects, so check them out and join in with this week's challenge if you can. Thanks for looking x
Sunday, June 14, 2009
Stamptacular Challenge 11
Hi ladies, this week on Stamptacular Challenge 11 we have a theme of "Fabulous Father's". As usual the DT have surpassed themselves and made some amazing creations, so go check out the blog and join in with the challenge if you can.
Instead of a fathers day card I have made a birthday card for my boyfriend's dad as his birthday is coming up in a few weeks.
He is quite musical and he plays the guitar, among other things, so this edwin image that I got from a blog bud was perfect for his card. As usual, it is coloured with distress inks and I also distressed the edge with weathered wood ink to really make the image stand out.
For the paper I went in search of some free sheet music to download and I thought it made a perfect background for the card. The embossed panel was done using the allegro folder, again keeping the musical theme.
I finished off the card with some black ribbon, a music note charm and some jewels.
For the inside I followed the same sketch (roughly!) and I used the same downloaded sheet music as my DP.
Finally, an image of the card from another angle!!!
Supplies
Card/Paper: Black and white card, free download
Stamp: Magnolia - Edwin with guitar
Colouring: Distress inks - vintage photo, tattered rose, weathered wood, fired brick, faded jeans, walnut stain, antique linen and black soot
Embellishments: American crafts ribbon, charm, jewels.
Tools: Cuttlebug, circle and scalloped circle nesties, allegro embossing folder, water brush, sponge.
Thanks for looking x
Labels:
Cuttlebug,
Distress Inks,
DT,
Magnolia,
Nestabilities,
Stamptacular
Saturday, June 13, 2009
WOJ New Release
Something Yummy
Wow, I can't believe it is almost a week since I posted. We have had visitors staying, but we are back into our normal routine now!
As I'm so behind I have made this card and it covers four challenges. I have used the fabulous sketch from WOJ challenge 34, Creative Inspirations Challenge 12 is to use four different papers, Creative Card Crew Challenge 14 is to use geometric patterns and finally Charisma Cardz Challenge 23 is something yummy... I think I have them all covered!!!
The stamp I have used is from WOJ and she is coloured with distress inks. My boyfriend's mum brought over loads of papers for me and these are two of them, but unfortunately I don't know the brand.
The flower is from Prima and the embossing has been done with swiss dots and floral fantasy embossing folders.
The inside of my card has been decorated to compliment the front and I have included a recipe for chocolate chip cookies! Yum!
The recipe and the sentiment on the front have been computer generated using the font lucinda handwriting.
Finally, I have an image showing a close up of my colouring.
Supplies:
Card/Paper: White and blue card, paper from stash
Stamp: WOJ - Willow with cookies
Colouring: Distress inks - tattered rose, walnut stain, dusty concord, weathered wood, faded jeans, vintage photo. Silver gel pen
Embellishments: Prima, pearls, PM pearl brad
Tools: Cuttlebug, swiss dots folder, floral fantasy folder, plain and scalloped circle nesties, leone em branch punch
Thanks for looking x
Monday, June 8, 2009
Etsy Store & Awards
I have recently been awarded these two blog awards from two very talented ladies, Joey and Carolyn. Their blogs are amazing and I really appreciate all the wonderful comments that they, and everyone else leaves for me, so a huge thank you girls.
I'm going to pass these on to some awesome crafters, so with further ado, they are going to Nicola, Joanne, Donna, Silke, Emma and Beccy. x
Also, I have finally got around to opening my Etsy store. I would love to know what you think and any feedback, good or bad, will be very much appreciated. I just hope I can sell something!!!
I'm going to pass these on to some awesome crafters, so with further ado, they are going to Nicola, Joanne, Donna, Silke, Emma and Beccy. x
Also, I have finally got around to opening my Etsy store. I would love to know what you think and any feedback, good or bad, will be very much appreciated. I just hope I can sell something!!!
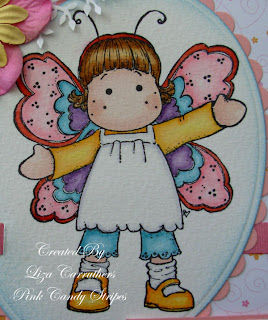
Butterfly Tilda
This week on Cupcake Challenge 43, Ida set a colour challenge and you have to use the colours blue, orange and pink and make a card for a child. This was a fab colour combo to work with and I really enjoyed making this card.
I am also entering this card for Just Magnolia Week 8 where there is a fabulous sketch to follow by the uber talented Rach, Dutch Dare Challenge 51 where you have to decorate the inside of your card and finally Secret Crafter Challenge 35 where the theme is bling.
I have used a gorgeous magnolia image that I received from a blog bud and it is coloured with distress inks.
The paper I have used is perfect for this colour combo and I think it is so pretty. It is from pebbles inc and I only bought 1 12 x 12 sheet and this is my last piece (weep weep). It is double side so it is so easy to match it together, just flip it over!
For the inside I used the same papers and the sentiment is computer generated.
Finally, a close up showing Tilda in all her glory!
Supplies:
Card/Paper: White and pink card, Pebbles inc
Stamp: Magnolia
Colouring: Distress inks - vintage photo, tattered rose, worn lipstick, fired brick, broken china, spiced marmalade, dusty concord.
Embellishments: Primas, jewel brad, jewels, american crafts ribbon.
Tools: Cuttlebug, nesties, water brush, sponge, leone em leaf punch.
Thanks for looking x
Labels:
Cupcake,
Cuttlebug,
Distress Inks,
Magnolia,
Nestabilities
Subscribe to:
Posts (Atom)