Thursday, April 30, 2009

Just Magnolia Ch 2 & Basic Grey Ch 32

Morning ladies! This is a very quick post from me today as we have visitors here for a short stay. I may be awol for a few days, but I will try and visit all of your lovely blogs at the start of next week, if I don't get the opprtunity this weekend.

This card is for two challenges, Just Magnolia Challenge 2 where the theme is pink and green and over on Basic Grey there is a sketch to follow.

I have used basic grey sugared papers and the image is coloured with distress inks. To embellish I have used my retro flower punch and I have punched flowers from BG paper and vellum, then I have put them on top of each other. I have also used BG sugared brads and ribbon from my stash.


This is a close up of my colouring and the flowers. I have been experimenting with using black to add shading to my images and this is the first time I have been brave enough!

Supplies:
Card/Paper: White and pink card, BG - Sugared
Stamp: Magnolia
Colouring: Distress inks - tattered rose, vintage photo, walnut stain, weathered wood, worn lipstick, black soot, peeled paint
Embellishments: Brads, dew drops, ribbon
Tools: Retro flower punch, scalloped scissors.
Thanks for looking x

Tuesday, April 28, 2009

Whiff of Joy Challenge 27

There is a fabulous sketch to follow over at the Whiff of Joy Challenge blog this week and yet again I have left it until the last minute! I just don't know where the time goes!!

I have used the WOJ presents tower stamp and it is coloured with distress inks. I love pink and blue together and I made the fatal mistake of colouring the image before choosing my papers and I couldn't find anything to go with it!!! Then I remembered I had downloaded these gingham papers from Chris's blog and they were just perfect!

I have used my d'vine swirl folder to emboss and I have embellished with primas, brads, american crafts ribbon and jewels.

Supplies:
Card/Paper: White, pink and blue card, downloaded from Chris
Stamp: WOJ - presents tower
Colouring: Distress inks - worn lipstick, broken china, weathered wood, black soot
Embellishments: Primas, ribbon, brads, jewels
Tools: Cuttlebug, d'vine swirl embossing folder, water brush
Thanks for looking x

Monday, April 27, 2009

Cupcake Challenge 37

As you can see, I'm doing Gorjuss Girl overload at the moment..... I wont use them again for a while...I promise!!! This is my DT card for Cupcake Challenge 37 where the theme is 5 embellishments and it was chosen by the lovely Caryn..... your creation must include 5 DIFFERENT embellishments (not including your card, papers or images!). You can use more than one flower or brad for example, but it will only count once!!! The other girls have made some awesome creations, so check them out and join in if you can.

For my card I have coloured the Sugar Nellie image with distress inks and I have cut the image and matting layer with oval nesties. The paper is from papermania and I have embossed the white panel with my d'vine swirl embossing folder to carry the swirly pattern through from the paper.

For the challenge my five embellishments are; prima flower, brad, jewel, ribbon and a charm.


I have also decorated the inside using the same theme as the front.

Supplies:
Card/Paper: Lilac and white card, papermania - amethyst infusion
Stamp: SN Gorjuss Girl - Just a Girl
Colouring: Distress inks - tattered rose, vintage photo, dusty concord, worn lipstick, weathered wood, black soot
Embellishments: Prima, brad, charm, ribbon and jewel
Tools: Cuttlebug, oval nesties, d,vine swirl embossing folder, water brush, scalloped scissors.
Thanks for looking x

Sunday, April 26, 2009

Stamptacular Challenge 4

This is my DT card for Stamptacular Challenge 4 where the theme is "Charmed, I'm Sure" - you have to use a charm on your card or project. This week we are sponsored by or very own Joanne and she has donated a fabulous prize that includes a SN stamp! As usual the other girls have excelled themselves and produced some fantastic designs so go and take a look and join in with our challenge!

I have used a sugar nellie stamp and she is coloured with distress inks. The papers are from papermania and I have cut two elements with my labels one nesties that are behind the image.

To embellish I have used dew drops, primas and of course a heart shaped charm.

Supplies:
Card/Paper: White and purple card, papermania - Amethyst infusion
Stamp: Sugar Nellie - Sweet n Sassy
Colouring: Distress inks - tattered rose, walnut stain, faded jeans, dusty concord, peeled paint, weathered wood, spiced marmalade and fired brick
Embellishments: Primas, dew drops, brad, charm
Tools: Water brush, cuttlebug, labels one nesties
Thanks for looking x

Creative Card Crew Challenge 7

Morning all, this card is for the Creative Card Crew Challenge 7 where the theme is round and around.
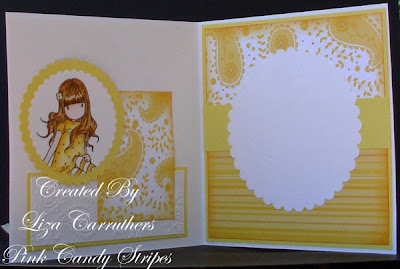
I have used my other gorguss girl and she is coloured with distress inks. I've gone for the bright, sunny look with this one and the papers I have used are from my stash.

The embossed panel has been done using my paisley embossing folder, which carries the theme through from the paisley paper.

For the round and around theme I have used my circle nesties and the buttons as embellishments.

I have also carried the same theme through to the inside of my card.


Apologies for the very poor photo, it is a bit breezy here today and I have had a heck of a job to take it!!!

Supplies:
Card/Paper: White and yellow card, paper form stash
Stamp: SN Gorjuss Girl - Sitting
Colouring: Distress inks - tattered rose, vintage photo, spiced marmalade, weathered wood and black soot.
Embellishments: PM Buttons, ribbon
Tools: Cuttlebug, nesties, paisley embossing folder, water brush.
Thanks for looking x

Friday, April 24, 2009

ABC.....K

Afternoon all, this card is for the ABC challenge where the letter is K and the theme is keep it simple..... just my kind of thing so how could I not do a card for this challenge!


I used one of my lovely Gorjuss Girls and she is coloured with distress inks. I so love these stamps....so pretty and a joy to colour.


The papers are basic grey and I kept my layout nice and simple. I used a rectangular card as I fear if it had been a normal square one I would have started to faff about more!!


The only embellishments I used were gingham ribbon and two small jewels. I tied a nice big bow at the bottom....I'm not the best bow tier but I'm quite please with this one!


The inside of the card has been decorated using the scraps from the front. I'm going to make an effort to do this more as I have a whole pile of scraps that I never seem to use!!


I assume a lot of people sell their cards? There just isn't the market for them here in Spain, so this one and a few others are going back to the UK and my Mum and Sister are going to try and sell them for me. It seems such a shame to have piles of cards sitting about collecting dust. I'm thinking of starting a shop on etsy, if anyone has any experiences with esty I would appreciate your comments!


Finally, to go with the card I have decorated the envelope and made a gift tag. This picture also displays my new watermark which I have finally got around to doing!!!..... although it is fairly large!!!


Supplies:
Card/Paper: Black and white card, basic grey - boxer
Stamp: Sugar Nellie Gorjuss Girls - just a girl
Colouring: Distress inks - black soot, tattered rose, fired brick and weathered wood
Embellishments: American crafts ribbon, jewels
Tools: Cuttlebug, nesties, pin, sponge and water brush.

Thanks for looking x

Thursday, April 23, 2009

Just Magnolia Challenge 1

I was up with the larks this morning, if fact I was awake before them as I just couldn't sleep last night, and although I completed this card a few days ago, this is the first chance I have had to put it on my blog!

The first challenge of the new Just Magnolia blog has a fabulous prize and there is an equally fabulous sketch to follow. I have used a stamped image that I have had for a while and I think she looks ever so cute holding her little cupcake and wooden spoon!

The image is coloured with distress inks and the papers are from my stash. I'm not really sure why but these papers, especially the checked one, really remind me of baking so I thought they were perfect for the card.


For the embossed section I cut out a circle with my nesties and ran it through my cuttlebug with the d'vine swirl embossing folder. The paper is handmade and it has a marble effect on it it silver, it doesn't really show in the picture but it is pretty in real life!!!

Because of the baking theme I popped a recipe for Chocolate Chip Cookies on the inside as well as decorating with the same papers as the front.


Supplies:
Card/Paper: White, green and pink card, papers from stash
Stamp: Magnolia
Colouring: Distress inks - tattered rose, walnut stain, vintage photo, weahtered wood, worn lipstick, black soot and peeled paint.
Embellishments: Primas, brads, ribbon
Tools: Cuttlebug, nesties, d'vine swirl embossing folder, water brush

Finally, I have recently received two awards from two awsome crafters, ida and hello gorgeous, so thank you ladies. I will pass them onto who ever visits my blog today.

Thanks for looking and I apologize for not getting around all of your fabulous blogs lately, but I will try in the next few days. x

Monday, April 20, 2009

Cupcake Challenge 36

This is my DT card for Cupcake Challenge 36 where Lauren has done a brilliant sketch for us to follow. The DT, as usual, have done a fantastic job so go and check out everyones take on the sketch and join in if you can.

I have used my FF cupcake stamp (which I'm afraid to say is no longer as one of our dogs - Monkey - chewed it...... I wasn't amused!) and I have mounted each image onto a scalloped square cut with a cuttlebug die. All of the cupcakes have been coloured with distress inks and the bottom one has been raised on foam pads for a bit of dimension.

The text stamp is from SU and it has been cut and mounted with my scalloped oval nesties. The papers are from K & Co and the ribbon is american crafts. I have embellished with two pins - these are just standard pins with a plastic ball on the top, but to make the match my card I used embossing powder and heat embossed them.

Supplies
Card/Paper: White and pink card, K & Co - Sparkly Sweet
Stamps: FF Cupcake and SU - Yummy Set
Colouring: Distress inks - vintage photo, weathered wood, fired brick. Whispers - Royal Blue
Embellishments: American crafts ribbon, pins, embossing powder
Tools: Cuttlebug, scalloped square die, nesties, scalloped scissors, needle, heat gun
Thanks for looking x

Sunday, April 19, 2009

Scalloped Edge Box Tutorial

This tutorial will show you how I made my scalloped edge box. It is my first attempt at a tutorial, so any constructive comments are welcome!! I have done loads of pictures, probably a bit too many so I will apologize in advance and I must make a mental note to myself, the next time I do a tutorial, iron the tablecloth first!!!!

The first thing you will notice below, is the measurements for the cardstock are a little odd!! so I will explain how I came up with these. The box measurements are based around the diameter of the circle you use to make your scallops. In this case, I have used the second largest die from the petite scalloped circles large nesties set, the diameter of which is 8.6 cms. My constructed lid will have a depth of 2 cms so my cardstock needs to measure: 2 cms + 8.6 cms + 2 cms = 12.6 cms, so my cardstock for the lid needs to be 12.6 x 12.6 cms. As my base is going to fit inside the lid, I have adjusted by taking off 3 mm, but the sides of the base will have a depth of 5 cms so my cardstock needs to measure 5 cms + 8.3 cms + 5 cms = 18.3 cms, so my cardstock for the base needs to be 18.3 x 18.3 cms. Hopefully this will become more clear as we go along.....

Step 1
You will need:
1 x cardstock measuring 12.6 x 12.6 cms (lid)
1 x cardstock measuring 18.3 x 18.3 cms (base)
Co-ordinating DPs and/or cardstock
Nesties or circle cutter - I have used the 2nd largest die from the nestie set petite scalloped circles large (the circle has a diameter of 8.6 cms)
Scoring tool
Ruler
Glue
Double sided tape
Scissors
Ribbon
Stamp and/or embellishments of your choice to decorate.


Step 2

First, we will make the base of the box. Take your largest piece of cardstock and score at 5cms in from the left edge. Turn your cardstock 90 degrees and score again at 5cms in from the left edge. Repeat until all four sides are scored then fold along each of your score lines.


From the picture on the left you can also see the base measurements a little more clearly. The centre square measure 8.3 x 8.3 cms and the sides are each 5 cms.


Step 3

Next, cut along each score line as directed in the picture on the right - this is quite hard to explain in words, I thought the picture would show it better!


Step 4

Turn your card over and glue each small flap, as shown in the picture


Step 5

Fold up each of the corners, as shown and stick.


The base of your box is now complete!


Step 6

For the lid of your box, repeat steps 2 - 5, but score and fold at 2 cms in from each edge.


Your main box is now complete.


Step 7

Now for the scallops! Using your cuttlebug and nestie (8.6 cm diameter) or circle cutter, cut out 4 circles - 2 from your cardstock and 2 from your co-ordinating DP.

In this case, I have used white cardstock and yellow gingham DP and I have sponged with spiced marmalade distress ink around the DP circles. Obviously the choice is yours, you could use two different DPs if you wish or two co-ordinating cardstocks.

Fold each of your circles in half and cut along the fold.


Step 8

Take your cardstock half circles and apply glue along the cut edge of each one. Stick each half circle along the edge of the lid of your box.


When you have applied all of your half circles, your box will look like this.


Step 9

Take your remaining half circles and fold them in half again - so they are quarter circles.

Glue the cut edges and apply them to the corners of your box lid.


When you have applied all of your half circles, your box lid will look like this.


Step 10

To hide all of your cuts and joins, you need to put some ribbon around the top. Apply double sided tape to the top edge of the lid, but leave a space so you can tie your bow. Apply your ribbon, tie it in a bow or knot and finally, decorate and embellish as you like.

I have used my WOJ mouse under party hat stamp which I have coloured with distress inks and I have finished it off with primas, a pearl brad and a small jewel.


If you are still here, thanks for bearing with me! I would appreciate any comments - good or bad - that you may have! You can make this little box in any size that you like to suit whatever gift you put inside, just remember to adjust your sizes as per the diameter of the circle you are going to use for your scallops. Thanks for looking x

Stamptacular Challenge 3

The weeks are flying away, we are onto our third challenge already! Stamptacular Challenge 3 has a theme of black, white plus one other colour and we have a fabulous prize from our sponsor The Cutting Cafe . As usual the DT have produced some stunning creations, so head over and take a look.

This is my DT creation for this week, a scalloped edge box. I obviously went with red as my "one other colour" - I love how it looks so vibrant with the black and white.

I have used my WOJ Melinda's Heart stamp as it is just a perfect size for the top of the box. It is coloured with distress inks and I have added a little red stickles to the smaller hearts for a bit of added sparkle (although it doesn't really show in the photo)

The papers are from Papermania and the pearls and ribbon are from my stash.


This is a closer look at the side so you can see the scalloped edges. If you would like to see how I made it, pop back later as I'm going to do a tutorial...... my very first one!!!

Supplies
Card/Paper: Black, white and red card, Papermania
Stamp: WOJ - Melinda's Heart
Colouring: Distress inks - fired brick, weathered wood
Embellishments: Red stickles, pearls, ribbon
Tools: Cuttlebug, nesties, water brush, scoring tool
Thanks for looking x

Saturday, April 18, 2009

I'm still here.....

Where has the week gone, I think I'm turning into a weekend crafter!!!! I've been making a few things that I can't show you just yet and today I have spent ages doing my first tutorial. Although when you see it, you will probably think it just took me ten minutes to cobble together!!... never mind, it is my first one and we all have to start somewhere!!!

My tutorial is something to do with my DT creation for tomorrow's Stamptacular challenge, so pop back tomorrow and take a look if you can!

Onto my card. This is for two challenges, Dutch Dare Challenge 44 is to use your favourite things - this is my favourite SK stamp, and Stamp Something has a theme of yellow, green and blue - they are all in there with a bit of pink too!!!

I coloured the SK image with distress inks and the papers are from Laura Ashley. I love these papers, but I'm not too sure about this card, I think it looks a bit washed out. All the embellishments are from my stash and I used a fiskars 4 in 1 punch for the corners.

Supplies:
Card/Paper: White, pink, green card, Laura Ashley - Contemporary
Stamp: Sarah Kay - Spring Blossoms
Colouring: Distress inks - tattered rose, walnut stain, faded jeans, worn lipstick, spiced marmalade, weathered wood, peeled paint and black soot
Embellishments: Primas, roses, ribbon and jewels
Tools: Water brush, fiskars 4 in 1 corner punch
Thanks for looking x

Monday, April 13, 2009

WOJ Challenge 25 & Creative Inspirations Challenge 3

My second post of the day, I haven't managed this for a while! This card is for two challenges; Whiff of Joy Challenge 25 has a fabulous sketch to follow by Katharina and Creative Inspirations Challenge 3 has a theme of scallops.

I have used Henry with a cupcake from WOJ and he is coloured with distress inks. The papers are from my stash and I have used my swiss dots folder for the embossing.

Supplies:
Card/Paper: White and blue card, paper from stash
Stamp: WOJ - Henry Celebrating Mouse
Colouring: Distress inks - tattered rose, weathered wood, black soot, vintage photo, spiced marmalade, worn lipstick and broken china
Embellishments: Primas, pearl brad, spacer, charm, american crafts ribbon, jewels
Tools: Cuttlebug, swiss dots embossing folder, label one nesties, water brush, scalloped scissors
Thanks for looking x

Cupcake Challenge 35

It is time for my second DT card for Cupcake Craft Challenges and Lauren has set a real toughie this week!

You have to make a one layer card - What that means: You may have one layer of cardstock other than your image and base. You could even just stamp on your base card. Its up to you. But you may use as many embellishments as you want eg. flowers, ribbon, buttons etc.

The rest of the DT have come up with some fantastic designs, so go and check them out and join in with the fun!

Well I pondered over this one for quite a while, after all that's why it's a challenge!! and this is the card I came up with. I must apologise again to my regular visitors, I'm experimenting with the back ground of my photos once again, going for the black look this time as white doesn't work for me!!!!

Anyway, back to the card..... I cut an aperture and stamped onto the inside of the card. I used a Sugar Nellie stamp and she is coloured with distress inks.... I so love this stamp.... I think it is my favourite one from the sweet art ebony collection.


The papers are from K & Co and I have embellished with ribbon, jewels and punched flowers.


I have shown a close up as you can't see the pretty image too well from my first picture... and she so deserves to be seen!!


Supplies:
Card/Paper: White card, K & Co BW Mira Designer Mat Pad
Stamp: Sugar Nellie - reflective
Colouring: Distress inks - tattered rose, walnut stain, weathered wood, fired brick, faded jeans, peeled paint and spiced marmalade.
Embellishments: American crafts ribbon, jewels, punched retro flowers
Tools: Cutting knife, sponge, water brush, retro flower punch
Thanks for looking x

Sunday, April 12, 2009

Stamptacular Challenge 2

We had a fantastic response to our first challenge and everyone enjoyed our day of bonus fun..... so onto week 2!

Stamptacular Challenge 2 is called "This is for the Birds" and you have to include at least one bird in your project. The DT have excelled themselves once again, so check out their creations and join with the fun. This week we have been sponsored by Pink Gem Designs and they have given us a fabulous stamp as this week's prize.

For my card I have used a Sarah Kay image and she is coloured with distress inks. The papers are papermania and I have used my stylized flowers folder for the embossing.

The sentiment is computer generated using the font lucinda handwriting and I have embellished with jewels and a prima flower.

Supplies
Card/Paper: White, blue and pink card, Papermania - Venetian Skies
Stamp: Sarah Kay - Precious Moments
Colouring: Distress inks - tattered rose, faded jeans, worn lipstick, walnut stain, weathered wood and spiced marmalade.
Embellishments: Prima, pearl brad, spacer, jewels
Tools: Cuttlebug, stylized flowers embossing folder, scalloped scissors, corner rounder punch and water brush.
Thanks for looking x

Saturday, April 11, 2009

Sugar Bowl Challenge 8

Afternoon ladies, this card is for The Sugar Bowl Challenge 8, where there is a fabulous sketch to follow. At this point I must make a mental note to myself to actually enter the card for the challenge, I totally forgot to add yesterday's card to the challenge blogs!!! What an idiot I can be sometimes!!!!

I have been dying to use my new Gorjuss girl stamps that I got for my birthday and I couldn't wait to make this card. The image has been coloured with distress inks and the papers are all papermania. This is the first time I have coloured black hair and been happy with it. I still have a bit of practicing to do, but I think its passable!! (well I hope it is!!)

I have used core'dinations gemstone cardstock for the embossed panel and it has been embossed using my swiss dots folder. I actually embossed the wrong side of the card by accident, but I wanted the pearly sheen to show, so the panel has....Mmmm.... "inverted" embossing!!!!


The sentiment was computer generated using the font lucinda handwriting and I kept the embellishments to a minimum as there are so many layers of different papers to add detail.

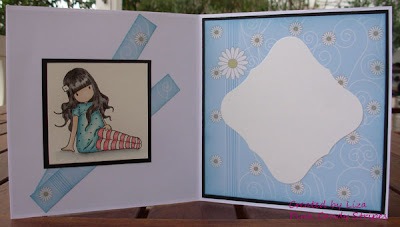
For the inside I used my other Gorjuss girl (isn't she pretty!) and the papers are also papermania. I used a labels one nestie to provide an area to write a sentiment.


Supplies:
Card/Paper: White and black card, Papermania - venetian skies
Stamps: Sugar Nellie - Gorjuss girls - Sitting and Just a Girl
Colouring: Distress inks - black soot, tattered rose, worn lipstick, broken china, fired brick and weathered wood.
Embellishments: Jewels
Tools: Water brush, cuttlebug, labels one nesties, swiss dots embossing folder, scalloped scissors, sponge
Thanks for looking x

Friday, April 10, 2009

Sketch Saturday Ch 45 & Secret Crafter Ch 26

Hi ladies, apologies for not being around much lately. My parents have been visiting and we have been decorating, so it has been all go!!! I have been a bad blogger too, but I promise I will try and visit everyone this weekend.

I managed to squeeze this card in and it covers two challenges; I followed the sketch on Sketch Saturday and the theme on Secret Crafter Challenge 26 is stripes.

I have used my new WOJ Melinda Blowing Kisses stamp - yes I know I'm a million years behind everyone, I just got this stamp for my birthday!! She is coloured with distress inks and the paper is from K & Co - my new favourite I think!

Supplies:
Card/Paper: White and red card, K & Co McKenna
Stamp: WOJ - Melinda blowing kisses
Colouring: Distress inks - faded jeans, fired brick, walnut stain, weathered wood, peeled paint, black soot and tattered rose.
Embellishments: Primas, pearl brad, charm, spacer, jewels and ribbon
Tools: Water brush, scalloped scissors, sponge
Thanks for looking. x

Monday, April 6, 2009

Cupcake Challenge 34

This is my fist challenge as a designer for Cupcake Craft Challenges and I'm super excited!!

The theme this week is folds and you have to make something with more than two folds in it. I found a tutorial on SCS for a Diaper Fold Pouch here, it was really easy to make with the added bonus of being so versatile. I have used mine to hold some hot chocolate, but you could use it to hold anything that is fairly flat.

To decorate my pouch I have used a Penny Black Stamp from the 12 days of christmas range and I thought she was perfect for this project! The image is coloured with distress inks, and cut and mounted onto card cut with circle nesties. I used scalloped scissors and ribbon to make the trim along the top.

Supplies:
Card/Paper: White and pink card, paper from my stash.
Stamp: Penny Black - 8 maids are milking from the 12 days of christmas pack.
Colouring: Distress inks - peeled paint, tattered rose, worn lipstick, weathered wood
Embellishments: American crafts ribbon
Tools: Cuttlebug, nesties, scalloped scissors and water brush

I hope you can join us this week, the rest of the DT have made some stunning creations so please join in if you can. Thanks for looking x

Sunday, April 5, 2009

Stamptacular Challenge 1

Morning ladies, well the day has finally arrived, Stamptacular Sunday Challenge Blog has begun and our first challenge is "new beginnings". We have a fabulous Making Memories prize that has been donated by our very own Kristin, and there are several mini competitions with prizes on offer throughout the day, so hop on over and join in the fun.

I made a tag card for a new baby. I went for a yellow and white colour combo so it could be used for either a girl or a boy. The penny black image has been coloured using distress inks and the gingham paper was a download.

The sentiment was done on my computer using the font lucinda handwriting and I used my swiss dots embossing folder for the embossed panel.

To keep the card closed I have cut two circles using my nesties and they are mounted using foam pads. For a bit of extra detail I have added a button and some ribbon.


The inside is decorated using the same papers and I have used a similar layout as the front. again the sentiment was done on my computer using the font lucinda handwriting.


Supplies:
Card/Paper: Yellow and white card, downloaded paper.
Stamp: Penny black
Colouring: Distress inks - vinatge photo, walnut stain, tattered rose, worn lipstick and spiced marmalade
Embellishments: PM button, ribbon, jewels
Tools: Cuttlebug, labels one and scalloped circle nesties, swiss dots embossing folder, water brush.


Come on over and join in the fun, I would love to see you there.


Thanks for looking x

Saturday, April 4, 2009

Just One More Day.....

Until the launch of Stamptacular Sunday Challenges. There’s guaranteed to be a favorite challenge for everyone…all are welcome no matter what your creative level is! The only stipulations to play along are that you MUST use some type of stamping on every submission and they MUST be originally designed just for our challenge!

It all begins on April 5th, 2009 so please check us out here join us for our very first challenge! In honor of our new adventure, we’ll also have lots of other fun and prizes going on throughout the day too! So, be sure to stop back often to celebrate our “New Beginning” and to ensure you don’t miss out on any of the activities!

Wednesday, April 1, 2009

Tag You're It Week 51

The theme this week on Tag You're It is cute and cuddly and they have some fab SN stamps as a prize. I have used my very cute Penny Black dog stamp and he is coloured with distress inks.

The paper and letters were from blog candy winnings and the ribbon is from my stash. I have used stickers to make the sentiment and I have embellished with glass-like pebbles.... I'm not sure what they are called!!

Supplies:
Card/Paper: White and blue card, paper from stash
Stamp: Penny black - contented
Colouring: Distress inks - vintage photo, weathered wood, black soot, broken china
Embellishments: Ribbon, letters, pebbles
Tools: Corner rounder punch, water brush, scalloped scissors
Thanks for looking x.

Only five days until the launch of the Stamptacular Sunday Challenge Blog keep the date in your diaries!!!!!